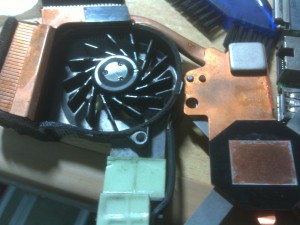
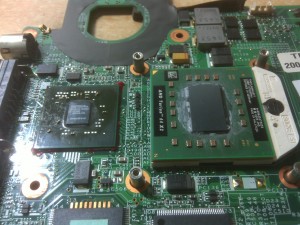
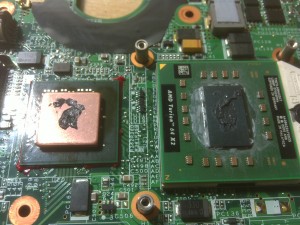
After more than 3 years hard-working, my laptop’s CPU and GPU temperature became higher and higher. So I finally make up my mind to tear it down to pieces to do a tougher cleaning. And more, I find that there’s a little gap between the GPU and the thermal-pipe, stuffed with very unpleasant silica gel, which is the reason why my GPU’s temperature never been lower than 80℃, which is unsafe and harmful to the GPU and other hardware close-by. To replace that, I brought a little piece of copper which thickness is 1.2mm to fit into that gap. And it turns out that the copper is a little too thick for the gap, but after the test I think it still do the work so maybe some time later I’ll buy a thinner one to replace it. Here’s the photo I took.

=v= Yes, I washed it…with water…


The initially tests shows like this:
GPU temp before Idle: 86℃, Full: 105+℃
GPU temp after Idle: 66℃, Full: ~90℃
which I am totally satisfied. By the way, I haven’t tested it precisely yet, but the battery life extended at least more than 20%, awesome!
Warning!!! Do not dissemble your computer if you don’t have the ability. I’ve done that several times before and I know exactly the structure of my laptop. Even though, this time when I done my modification and assemble the parts together again, the screen and one of the memory bank do not function normally. It took me some time to fix. So it is a highly risky action and do think about it seriously before you do something stupid…
你还有这项技术啊..
确实有@@考完G再写
额..是不是校内发过..
是啊,又没写日志@@~这个算日志嘛~
我觉得以后我还是每年把电脑送到蓝快去做一次清洁吧……之前清洗家里台式机主板,主板还没干透就装好开机弄得主板烧掉的经历到现在想起来还心有余悸……
水洗主板啊。。。。= =